1. Data Access Layer
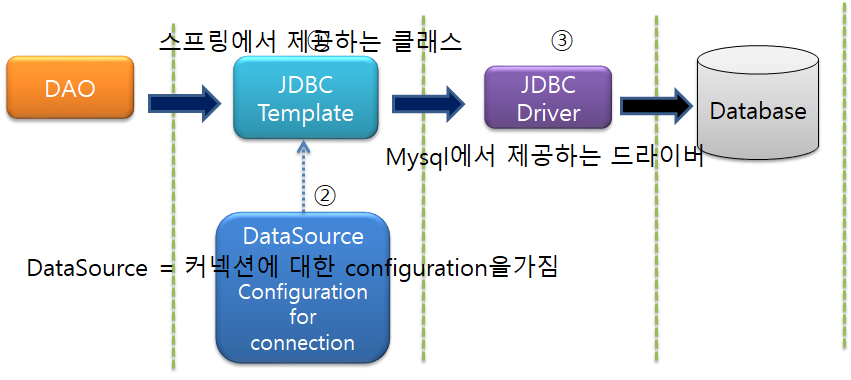
DB에 접근하기 위해 다음 그림과 같이 DAO는 JDBC Template에 이는 JDBC Driver를 통해 Database에 접근하고 DataSource를 이용하여 DB에 실질적으로 커넥션 한다.
2. Data Source
데이터 베이스에 접근하기 위해 DataSource를 사용한다 DataSource의 종류는 다양하지만 DBCP라이브러리의 BasicDataSource를 통상 많이 사용하므로 실습에서도 이를 사용할 예정이다.
3. DAO란?
Data Access Object의 약자로서 서비스는 DB에 대해 아무것도 모르고, 실질적으로 DB에 접근하는 오브젝트를 의미한다. 쉽게 생각하여 DB의 CRUD를 실질적으로 수행하는 코드가 담긴 부분이다.
4. JDBC란?
JDBC란 DB와의 커넥션, SQL 사용, Close 커넥션 등 잡다한 일들을 해주는 프레임 워크이다. 기본 JAVA JDBC는 커넥션 등 try catch의 반복으로 반복적인 코드를 짜야하지만 Spring JDBC를 사용하면 SQL만 코드를 작성하고 나머지는 Spring 프레임워크에서 담당한다.
5. 실습하기
#1) 사전 준비
- Mysql 5.7.28 설치
Mysql내부에는 csemall라는 DB, offers라는 테이블을 만들고 다음과 같은 구조로 이루어져 있다.
| id(INT) | name | text | |
| 1 | Alice | Alice@google.com | alice |
| 2 | Bob | Bob@google.com | bob |
| 3 | Jun | Jun@google.com | jun |
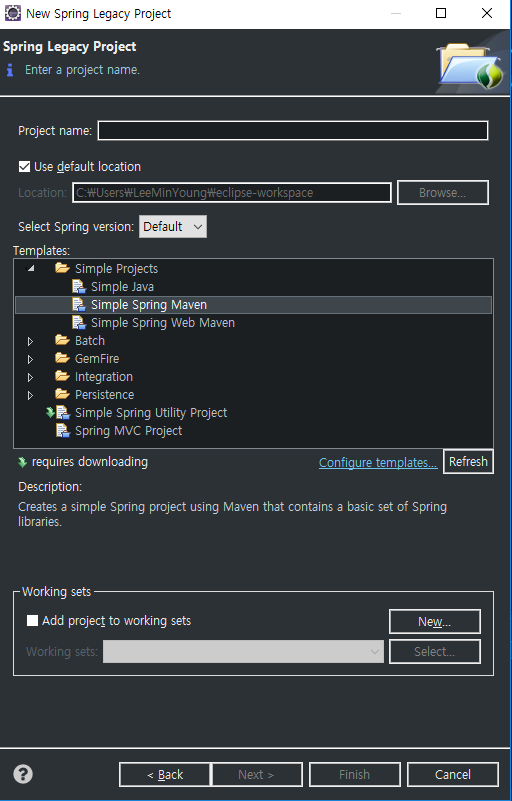
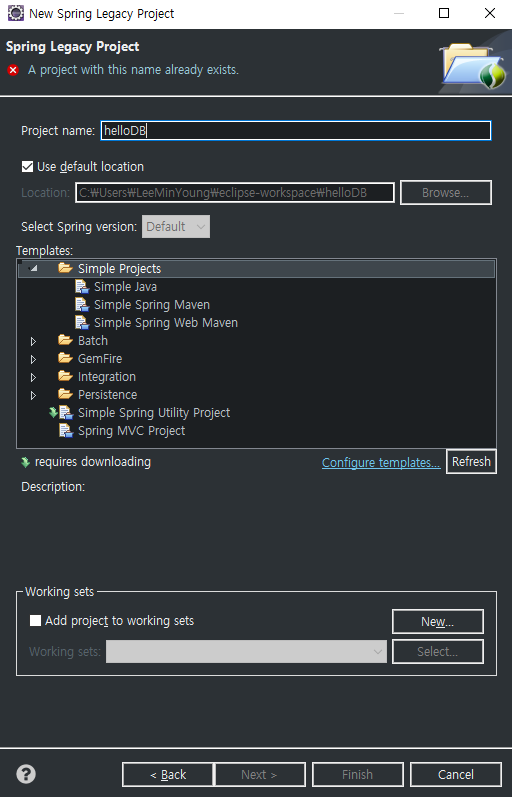
#2) Simple Spring Maven 프로젝트 실행
다음과 같은 helloDB프로젝트를 생성한다.
#3) pom.xml 수정
다음과 같은 dependency를 추가하고 저장을 누르면 maven에 라이브러리가 추가된 것을 확인할 수 있다.
		<dependency>
			<groupId>mysql</groupId>
			<artifactId>mysql-connector-java</artifactId>
			<version>5.1.38</version>
		</dependency>
		<dependency>
			<groupId>org.springframework</groupId>
			<artifactId>spring-jdbc</artifactId>
			<version>4.1.4.RELEASE</version>
		</dependency>
		<dependency>
			<groupId>org.projectlombok</groupId>
			<artifactId>lombok</artifactId>
			<version>1.18.4</version>
		</dependency>
		<dependency>
			<groupId>org.apache.commons</groupId>
			<artifactId>commons-dbcp2</artifactId>
			<version>2.1.1</version>
		</dependency>
#4) jdbc.properties 생성
props라는 패키지를 생성하고 그 밑에 jdbc.properties라는 파일을 생성한다. 파일 내부는 다음과 같다 이는 DB의 정보를 담고 있으며, 생성할 bean에 하드 코딩하는 것보다 좋은 방법이다.
jdbc.username = root
jdbc.password = 사용자 비밀번호를 입력
jdbc.driverClassName = com.mysql.jdbc.Driver
jdbc.url = jdbc:mysql://localhost:3306/csemall
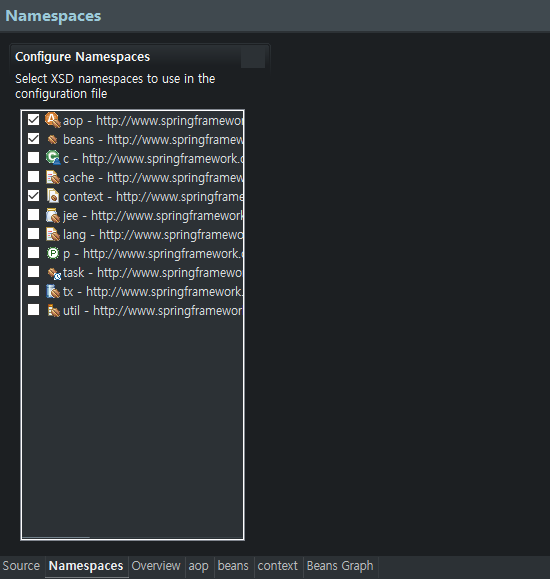
#5) beans.xml 생성
다음과 같이 beans.xml을 생성한다 context:annotation은 DAO클래스에서 사용할 @Autowired를 활성화한다는 의미이며 context:component는 @Component 에노 테이션이 있는 어떤 패키지를 scan 할 건지 명시하는 부분이다. bean으로 생성한 dataSource는 #4에서 생성한 jdbc.properties를 사용하여 실제 DB와 커넥션을 하는 부분이다 dbcp2의 BasicDataSource클래스를 사용하고 있고 이 클래스는 DataSource인터페이스를 따르는 클래스이다. 마지막으로 context:property-placeholder는 앞서 사용할 jdbc.properties가 어떤 위치에 있는지 명시하는 부분이다.
<?xml version="1.0" encoding="UTF-8"?>
<beans xmlns="http://www.springframework.org/schema/beans"
	xmlns:xsi="http://www.w3.org/2001/XMLSchema-instance"
	xmlns:context="http://www.springframework.org/schema/context"
	xsi:schemaLocation="http://www.springframework.org/schema/beans http://www.springframework.org/schema/beans/spring-beans-3.2.xsd
		http://www.springframework.org/schema/context http://www.springframework.org/schema/context/spring-context-3.2.xsd">

	<context:annotation-config></context:annotation-config>
	<context:component-scan base-package="csemall"></context:component-scan>

	<bean id="dataSource"
		class="org.apache.commons.dbcp2.BasicDataSource" destroy-method="close">
		<property name="driverClassName"
			value="${jdbc.driverClassName}" />
		<property name="url" value="${jdbc.url}" />
		<property name="username" value="${jdbc.username}" />
		<property name="password" value="${jdbc.password}" />
	</bean>


	<context:property-placeholder
		location="kr/ac/hansung/spring/props/jdbc.properties" />

</beans>
#6) OfferDAO 클래스 생성
src/main/java아래의 csemall이라는 패키지를 만들고 다음과 같은 Class를 생성한다. @Component 에노테이션은 이 클래스는 id가 offerDAO라는 bean을 하나 생성하겠다는 의미이다. 또한 JdbcTemplate를 사용하여 bean에 생성한 dataSource를 주입(@Autowired)시켜 DB와 실질적인 커넥션을 해주는 부분이 담겨있다. getRowCount() 부분은 다음과 같은 sql을 query 하고 결과는 Integer로 받는다는 의미이다.
package csemall;

import javax.sql.DataSource;

import org.springframework.beans.factory.annotation.Autowired;
import org.springframework.jdbc.core.JdbcTemplate;
import org.springframework.stereotype.Component;

@Component("offerDAO")
public class OfferDAO {
	private JdbcTemplate jdbcTemplateObject; //얘는 new를 사용해됨 이후 DataSource는 DI를 통해 주입 시킬예정

	@Autowired
	public void setDataSource(DataSource dataSource) { //DataSource는 인터페이스인데 우리가 앞서 bean에 선언한 datasource가 이 인터페이스를 따르고 DI한다
		this.jdbcTemplateObject = new JdbcTemplate(dataSource);
	}

	public int getRowCount() {
		String sqlStatement = "select count(*) from offers";
		return jdbcTemplateObject.queryForObject(sqlStatement, Integer.class);
	}
}
#6) Offer.java 클래스 생성
Lombok을 이용해 @Getter, @Setter를 생성하였고 DB에 저장된 id, name, email, text를 받는다. 이는 추후에 사용될 클래스이다.
package csemall;

import lombok.Getter;
import lombok.Setter;

@Getter
@Setter
public class Offer {
	private int id;
	private String name;
	private String email;
	private String text;

	public Offer() {

	}

	public Offer(String name, String email, String text) {
		this.name = name;
		this.email = email;
		this.text = text;
	}

	public Offer(int id, String name, String email, String text) {
		this.id = id;
		this.name = name;
		this.email = email;
		this.text = text;
	}
}
#7) MainApp.java 클래스 생성
다음과 같이 코드를 작성한다 ClassPathXmlApplicationContext를 이용하여 beans.xml을 읽어오고 읽어온 context의 offerDAO라는 빈을 이용하여 getRowCount() 함수를 출력한다
package csemall;

import org.springframework.context.support.ClassPathXmlApplicationContext;

public class MainApp {

	public static void main(String[] args) {
		ClassPathXmlApplicationContext context =
				new ClassPathXmlApplicationContext("kr/ac/hansung/spring/csemall/beans/beans.xml");

		OfferDAO offerDAO = (OfferDAO) context.getBean("offerDAO");
		System.out.println(offerDAO.getRowCount());

		context.close();
	}

}
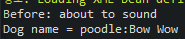
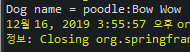
#8) 실행화면
MainApp.java를 실행하면 다음과 같은 결과를 확인 할 수 있다.

'프로그래밍 > Spring' 카테고리의 다른 글
| [스프링 강의] #10 스프링 MVC패턴 실습 / spring MVC / MVC란? (0) | 2020.01.29 |
|---|---|
| [스프링 강의] #9 스프링 & MYSQL 연동2 / SQL 배우기 (0) | 2020.01.18 |
| [스프링 강의] #7 스프링 AOP(Aspect Oriented Programming)란? (0) | 2020.01.03 |
| [스프링 강의] #6 의존성 주입, DI(Dependency Injection) 2번째 Annotation활용하기 (0) | 2019.12.22 |
| [스프링 강의] #5 의존성 주입, DI(Dependency Injection)란? (2) | 2019.12.16 |